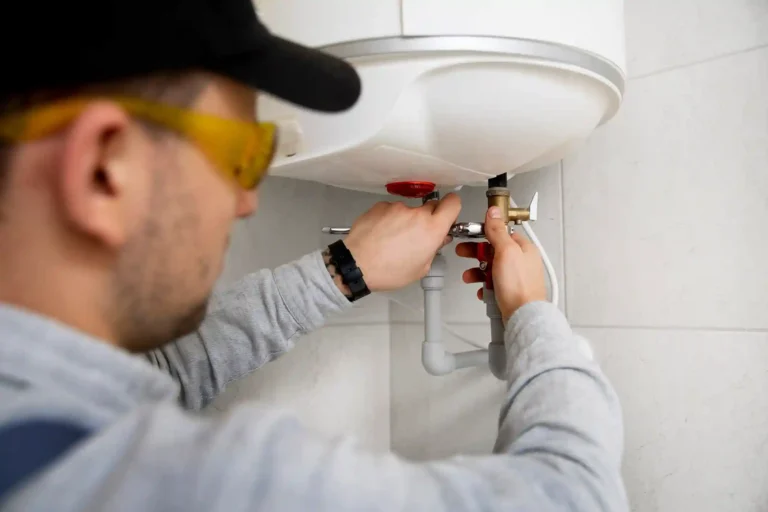
Dealing with a broken garage door spring can be frustrating and inconvenient, leaving your garage door stuck and disrupting your daily routine. In this article, we’ll explore common signs of a broken spring, what causes it, types of garage door springs, and the best steps to fix the issue. Get expert help fast to address these problems and save time and money by avoiding unnecessary repairs or replacements.
If you haven’t given much thought to your garage door recently, it’s important to know that proper care, such as preventative repair and timely replacement, can help you avoid costly damage. These springs, while often ignored, support the entire weight of the door, and the strain they endure means they’ll eventually reach the end of their shelf life.
By paying attention to signs of trouble, like unusual noises or difficulty when using the door, you can address problems early. Being knowledgeable about garage door maintenance ensures your system stays in top shape, safeguarding both your home and peace of mind.
How to Fix Broken Garage Door Springs? – The Short Answer
Why Garage Door Springs Matter
The garage door might seem like a simple part of your home, but it’s surprisingly heavy and relies on springs to function properly. These springs make it possible for the door to be easily lifted using either a garage door opener or by operating it manually, despite its significant weight.
For larger garage doors, torsion springs are installed on the wall above the door, ensuring smooth operation. On the other hand, extension springs are positioned on the sides of a one-piece garage door or mounted along horizontal tracks. These setups often involve a cable and pulley system to distribute tension evenly and maintain balance.
Signs Your Garage Door Springs Need Immediate Repair or Replacement
If you’ve ever dealt with a broken garage door, you know how frustrating it can be. A garage door that suddenly stops operating often points to issues with the springs. Here are some tell-tale signs that your garage door springs are damaged and may need repair or replacement:
Loud Noise or Crashing Sound
A loud noise, like a crashing sound, is one of the most common signs of unwinding or broken springs. This can happen even if the door hasn’t fallen yet, leaving you startled.
Visible Gap in the Spring
When springs are broken, you’ll often notice a gap in the spring. Normally, the springs should be tightly wound and connected end-to-end, without any gaps. A visible gap means the system is compromised.
Bent Panel at the Top of the Door
A bend at the top of the door panel is another tell-tale sign. This occurs when the spring can no longer support the door, causing misalignment.
Door Falls Quickly
Without the proper counterbalance provided by the springs, gravity’s pull will cause the garage door panels to fall quickly. This is not only inconvenient but can also be dangerous.
Crooked Movement Along the Track
If your garage door moves unevenly along the track, it’s a sign of damaged springs. The door might still open, but it will appear crooked as it goes up and down.
Loose or Slack Cables
Broken springs often cause the cable system to become loose or slack. You may notice hanging cables from the ceiling, which indicates something is wrong with the tension.
Causes of Broken Garage Door Springs
When it comes to garage door springs, they are vital components of your garage door system, but they can eventually fail due to various reasons. Let’s explore some of the top causes of broken springs and how you can address them effectively.
Rust: Leads to a reduced lifetime, inefficient operation, and eventually broken springs. Prevent by applying lubrication regularly.
Daily wear and tear: Springs have a common lifespan of 10,000 cycles. Overuse without care weakens garage door springs. Limit unnecessary use and schedule regular tune-ups.
Lack of proper maintenance: Without regular care, springs cannot last forever, even though they are engineered for durability. Proper lubrication and balance checks can prolong lifespan.
Professionals like A1 Garage Door Service ensure your springs stay in good condition. They offer regular garage door tune-ups, inspection, and lubrication a few times a year, while also checking the system’s balance once a season.
Types of Garage Door Springs
Selecting the right springs can make a significant difference in the performance and safety of your garage door. Let’s explore the two main types of garage door springs in a practical and easy-to-understand way.
Torsion Springs: The Efficient Choice
Torsion springs twist to store energy and operate the garage door, typically mounted above the door for added efficiency and safety. They are the preferred choice for newer garages due to their durability and reliability. Upgrading to torsion springs can make your garage door quieter and easier to use.
Extension Springs: The Classic Option
Extension springs expand and compress, running along the upper tracks on both sides of the door. Common in older garage doors, they are now being replaced by torsion springs for their better performance and safety. While functional, they often require more maintenance compared to torsion springs.
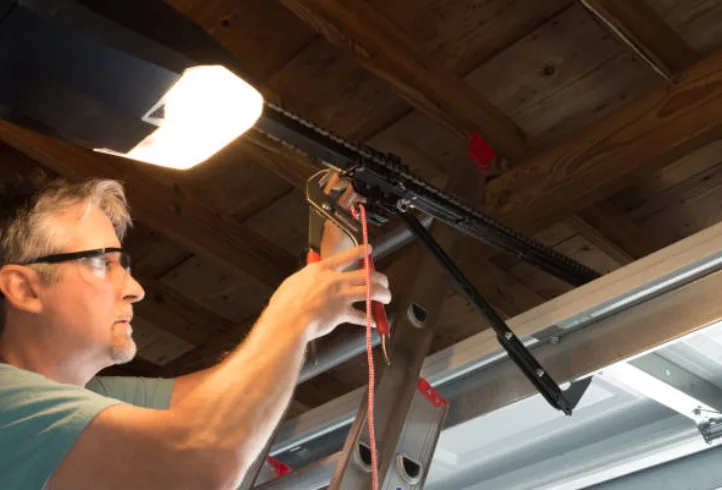
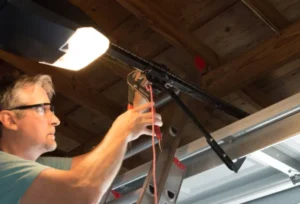
How to Fix Broken Garage Door Springs | Step-by-Step Guide
Replacing garage door springs is a difficult task. Begin by securing the door, then measure the old springs to ensure accurate replacements. Carefully unwind the old springs before detaching them and installing the new ones.
Measure the Old Springs
- Use a tape measure to determine the length of the old spring from end to end.
- Record the measurements accurately, including any visible markings or labels for identification.
- Measure the diameter of the spring with a caliper or ruler.
- Verify the wire size using a gauge tool or refer to the manufacturer’s specifications.
- Check the wind direction of the spring (left-hand wound or right-hand wound).
- Inspect the spring for signs of wear, such as rust, elongation, or deformation.
- Use these observations to ensure you acquire the correct replacement for your specific system.
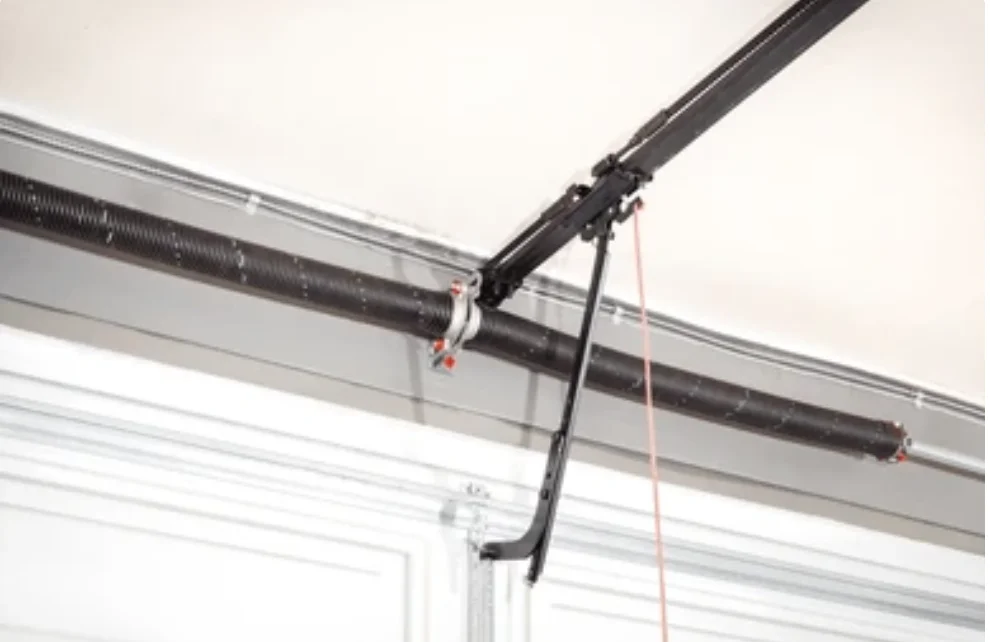
Secure the Door and Unwind Old Springs
- Ensure the door is closed and securely clamped to prevent movement.
- Use locking pliers to clamp the torsion tube to stop it from turning.
- Insert a winding bar into the holes on the winding cone and carefully release the tension by slowly turning the bar.
- Continue until the spring tension is completely released.
- Carefully detach the old spring from the torsion tube..
- Repeat the process for any additional springs.
Detach and Remove the Broken Spring
- Disconnect the garage door opener by unplugging it to prevent accidental activation.
- Secure the door in an open position using a C-clamp or locking pliers.
- Loosen and remove the set screws using a winding bar.
- Cautiously release the tension and carefully detach the broken spring from its brackets.
- Inspect the brackets and hardware for signs of wear or damage.
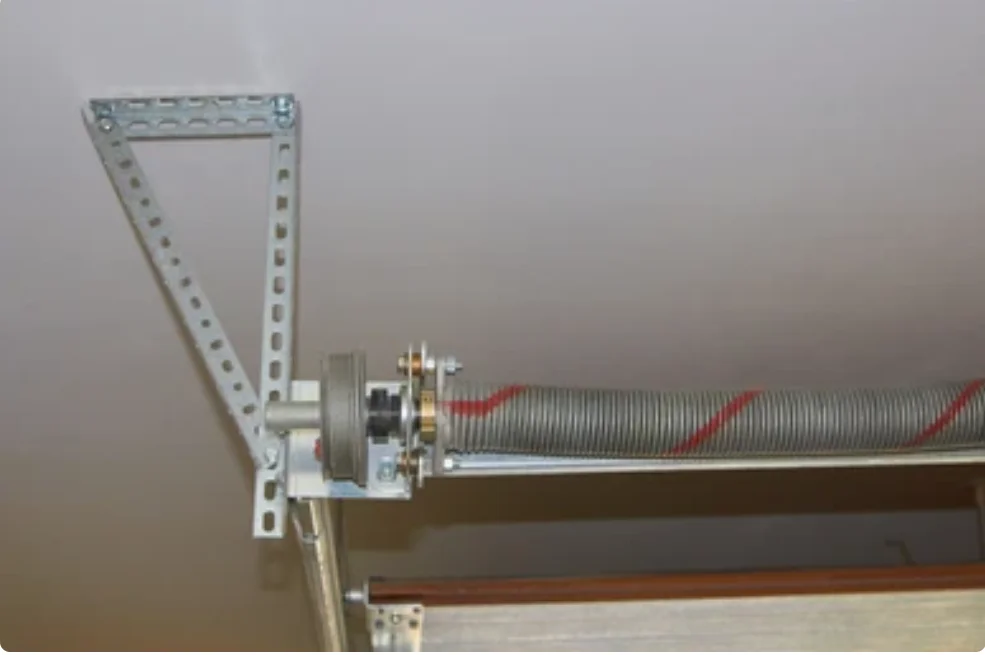
Install the New Spring
- Measure the length and inside diameter of the old spring to confirm the correct replacement.
- Use winding bars to handle the unwinding and safe removal of the previous spring.
- Secure the new spring in place following the manufacturer’s instructions.
- Use the appropriate tools to wind the spring and ensure smooth operation.
Wind and Secure the New Springs
- Confirm the springs are the correct size and type for your garage door.
- Position the spring accurately on the torsion tube.
- Use a winding bar to tighten the spring in the specified direction.
- Secure the spring using set screws or other recommended mechanisms.
- Manually lift the door to test its balance. If it remains steady when partially open, the new springs have been properly wound and secured.
If you face challenges or feel unsure about the task, it’s best to seek professional help to ensure safety.
How to Handle a Garage Door With a Broken Spring
Dealing with a broken garage door spring can be challenging, but it’s not impossible. With the right approach and some caution, you can still manage opening your garage door. Below are practical steps to help you try this safely. Always remember to avoid starting this process without proper help and preparation.
1. Get Ready and Set for the Task
Before anything else, ensure you have someone to assist you. Handling a broken spring alone can be risky. Having an extra pair of hands will make it safer and easier to manage.
2. Use the Emergency Release Cord
Locate the red emergency release cord on the door opener mechanism. Pull it down to detach the opener from the door mechanism. This step is essential to manage the door manually. Make sure the opener is completely detached before proceeding.
3. Prevent Falling With Proper Tools
To keep the door steady, place a vice grip or a heavy block under it. This step will help prevent falling and ensure the door doesn’t move unexpectedly.
4. Lift the Door in Sections
With your helper’s strength, begin lifting the door from the bottom. Use your full body strength and work together. You can secure the door at various sections by using supporting objects like wooden blocks. This ensures stability as you progress.
5. Secure the Tracks
Once the door is fully open, use C-clamps or similar tools to hold the rollers and tracks in place. This prevents the door from sliding closed unexpectedly, keeping it stable and safe for everyone involved.
Steps to Close a Garage Door When the Spring Is Broken
Dealing with a broken spring on your garage door can feel overwhelming, but following these steps can help you manage it safely. With a bit of caution and some assistance, you can manually close the door without causing further damage to its components.
Pulling the Door Down
Start by asking someone to assist you. Stand at the bottom corners of the garage door and begin pulling it down in unison. Carefully steer the door out of the horizontal rails without letting it close abruptly. This will help avoid damage to key components like cables, tracks, or the motor.
Securing the Door
Once the door is fully down, check to ensure it is stable and properly secure to prevent any accidents.
Reconnecting the Mechanism
Reattaching the opener and mechanism requires effort and can be tricky. If unsure, contact a reliable company to fix the broken springs and avoid any potential injury or further issues.
Reach Out to A1 Garage for Door Spring Repairs
If your residential garage door or commercial garage door needs its springs replaced, trust A1 Garage Door Service to handle your garage door needs. From repairs to preventative maintenance, they excel in fixing garage door openers and more. Easily contact them online or schedule a repair today to keep your door working smoothly.
FAQs
Is it possible to open a garage door with a broken spring?
Handling a broken garage door spring demands careful attention. Using the remote can cause excessive force, damaging the motor, while manually moving the door is dangerous without proper tools or experience. We advise against this and recommend seeking help from experienced contractors. Always prioritize safety and let professionals handle the issue.
How can I tell if my garage door spring is damaged?
Signs of a broken spring include difficulty opening the door, loud snapping noises, or the garage door looking uneven when raised.
Can I open my garage door with a broken spring?
It’s not recommended, as it can cause further damage to the door or opener and may pose safety risks. Always get it repaired by professionals.
How much time is needed to fix a broken garage door spring?
A professional can usually replace the spring in about 1-2 hours, ensuring the job is done safely and efficiently.
What causes garage door springs to break?
Common reasons include wear and tear, rust, poor maintenance, or extreme temperature fluctuations that weaken the springs over time.